Showing posts with label Home Decor. Show all posts

Friday, April 19, 2013

Curtains and lampshades!

FINALLY! After about 3 months of having lamps without lamp shades, I've finally finished my repurposed lamps. Do you want to know the best part? It cost me a total of $8.


So, here's the scoop. The lamps came from my Dad's old living room, which my sister had been using. When she moved out she left them for us. At that time they were a lovely hunter green and brass. So, I pulled out my chrome spray paint and some vinegar and did my best at faking mercury glass. (There are lots of tutorials out there but the basic steps are: Tape of all cords and switches, spray with chrome or Krylon's looking glass, spray with vinegar and water mixture, wipe away, repeat).


Then they sat there. For a long time. I looked EVERY WHERE for lamp shades. I made the huge mistake of throwing away the previous shades (although they were cracking and had turned a funny shade of yellow) instead of stripping the material and repurposing the metal frame. I know, there are lamp shades out there for as low as $12 (the cheapest I could find), but $24 for something repurposed? Maybe I'm super cheap, but I wasn't all about that.

Fortunately, when we were visiting my mom over Spring Break she gave us some old drum style lamp shades that she had removed from previous lamps and had in storage! WOO HOO! They were perfect. So, I stripped off the green stripes on the top and bottom and recovered them with some fabric that Kathy had left over from an upholstery project!

Lastly, we bought lamp harps in order for the shades to fit onto the lamps (which is where the $8 was spent).

So now are lamps are complete! YAY :)

Also, I finished "making" the curtains for our french doors that lead to our craft-study-guest-home for random things-art room. This project was also an incredibly frugal one. Mainly because, hey, curtains are expensive. So, why not use bedsheets instead? I bought two queen size bedsheets at Walmart for $10 each. And then found this awesome tutorial on making a curtain rod ('cause hey, those are pretty darn expensive, too!). I got a piece of electrical conduit for $2 and then bought some finials that closely matched the ones over our other windows on ebay for $10. Lastly, I got curtain hardware at Walmart for $1. Pretty awesome. So, total cost for two curtain panels and an 8ft curtain rod = $33. Not too shabby.


Don't mind that random shadow behind the door. It's just my dad's cornhole set. Oh the joys of having a completely unorganized guest room that doubles as a craft room.
Yay for completing two projects on my list! Only 168 more to go :)

Friday, January 18, 2013

Our new bed!

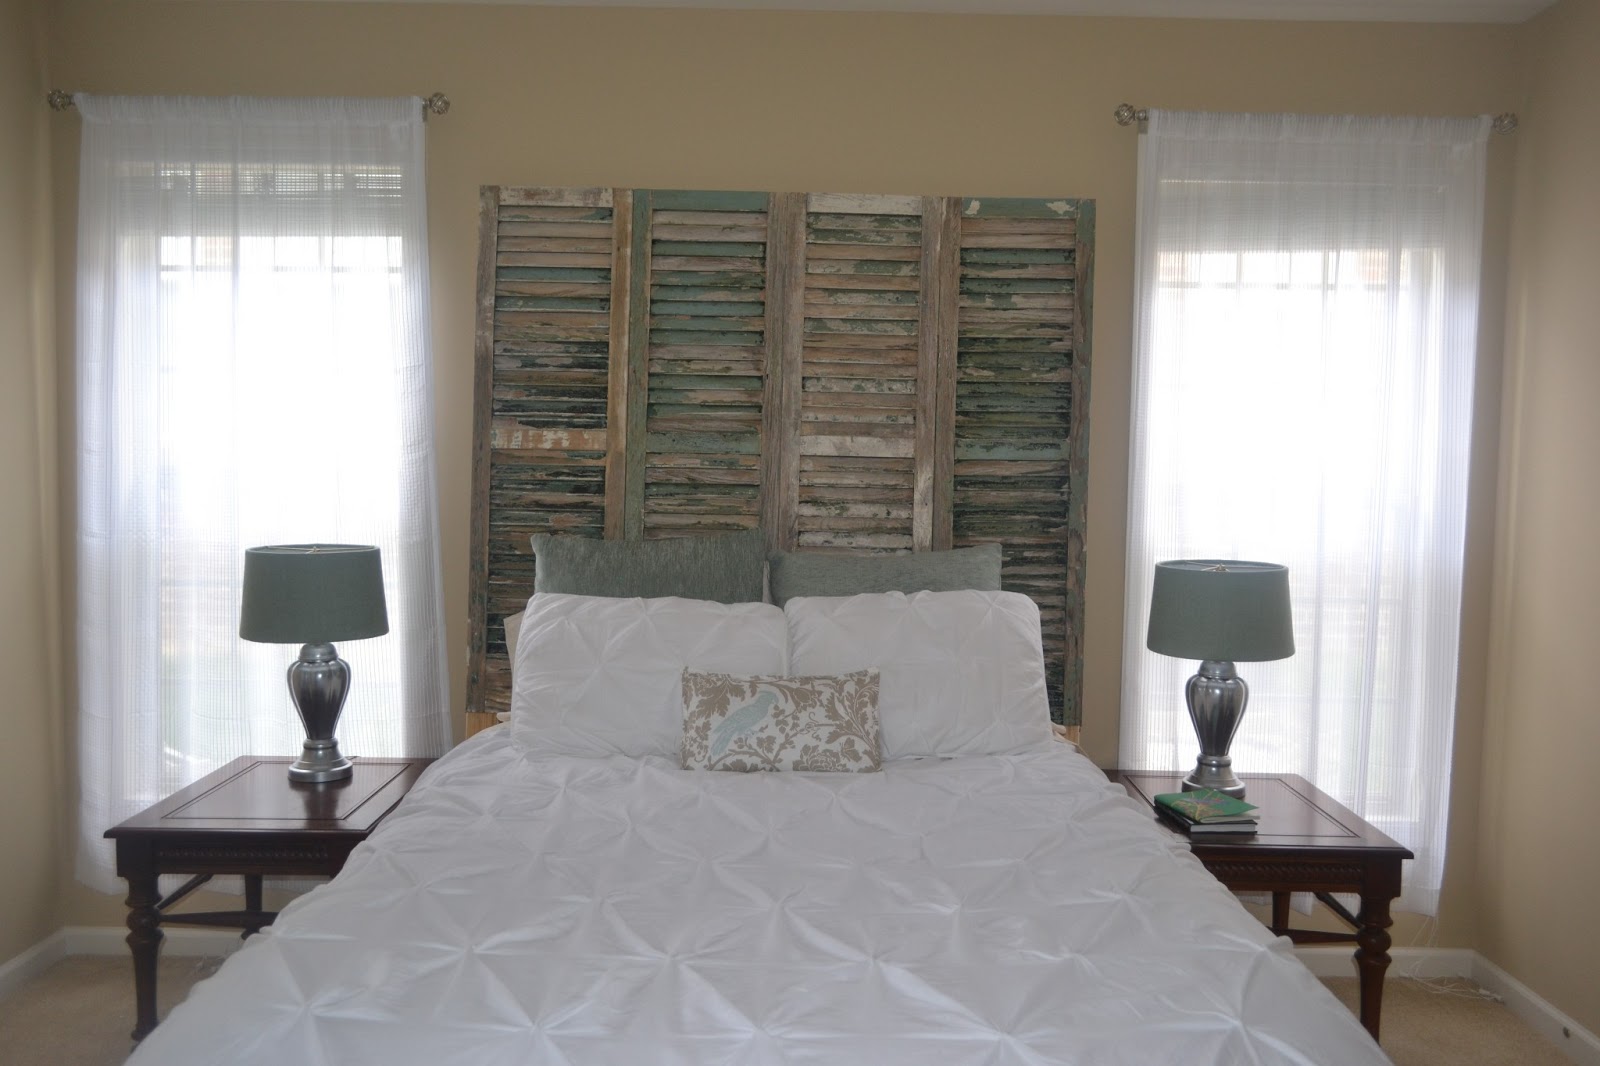
I can't tell you how happy I am that our first major project for our bedroom is complete! Okay, I guess I can tell you. I'm really really really happy. So happy that every time I walk into our room and see our bed I sort of giggle to myself. And now I make the bed every. single. morning. just so I can look at it all day.  It totally changes the whole "ness" of our room and I LOVE the direction it's going.


And just so you can see the difference between what it used to look like and now. Here's this gem from the day we moved in:


That bed frame is my sister's. She let us swap because we only had a frame and her headboard and footboard took up too much space in her apartment. Our bedding was a wedding gift. While I still love it, I wanted a lighter more romantic, shabby chic feel.


Big difference huh? Please ignore the fact that I STILL don't have lampshades for our repurposed lamps. Who knew that lampshades were so expensive? I just can't justify spending 30 dollars on new lampshades when the whole purpose of the project was to save money. Anyone know of a good place for cheap lampshades? Excuse my digression. This post isn't about lampshades. It's about our awesome new bed :)


The shutters were purchased at a salvage yard in South Carolina. Sarah talked me into going because they got tons of stuff there for their wedding for a good deal. Thank goodness she did! And you know what the best part is? They came JUST like that. Okay, well, I pressure washed them and scrubbed them down. But all that perfectly awesome antiqued old paint? Yep. That was how they came. I didn't even have to do a darn thing. We put the headboard together by following this tutorial. We followed it almost exactly, improvising where we weren't totally sure. We didn't do the crown molding at the top either.


These are the pillow covers I made with my brand spanking new sewing machine! I found the fabric (both drapery/upholstery fabrics) at Hancock's along with the pillow forms. I followed this tutorial for the large Euro pillows and this tutorial for the small rectangular pillow (Although, if  you are going to do a rectangular pillow, chat with me first so I can tell you how to make some alterations).


Also, the white duvet cover, shams and bedskirt all came from Target. I'm pretty much in love with it. When we eventually buy new rails for our bed (we are using a set of rails that were originally on a twin bed in the guest room), we will buy a little bit taller ones so that 2 X 4 (in the photo above) won't show at all :)

Thanks for checking it out! Can't wait for our next project for this room: My great grandma's dresser and curtains for those french doors :)

Wednesday, October 17, 2012

Ruler Growth Chart for little ones.

I've finally started finishing some of the twenty something projects I have going right now! Woot woot. I bought the supplies for a wooden height chart that I saw on pinterest ages ago, but just hadn't started it because there were more pressing projects at hand. But last weekend I started it and finished it all in one day! That rarely happens. Okay, never happens. The work was quick and I had Chuck to help out with Jackson so I just kept on trucking!

source

I saw this adorable oversized ruler growth chart floating around pinterest and wanted to try making it on my own.

Time commitment:

around 4-5 hours

Cost: 

approximately $15

Supplies:

1. Rust-oleum's american walnut stain (I got mine at Lowe's for seven dollars and some change)
2. A 1 x 10 x 6 (I also got this at Lowe's for around five dollars)
3. Black acrylic paint (I used some old stuff I had on hand)
4. Printed numbers 1-6 (I printed my favorite font at 200 pt.)
5. Pencil
6. Measuring tape
7. Paint brush
8. Finishing sander with 100, 150 and 220 grit sandpaper
9. Old rag

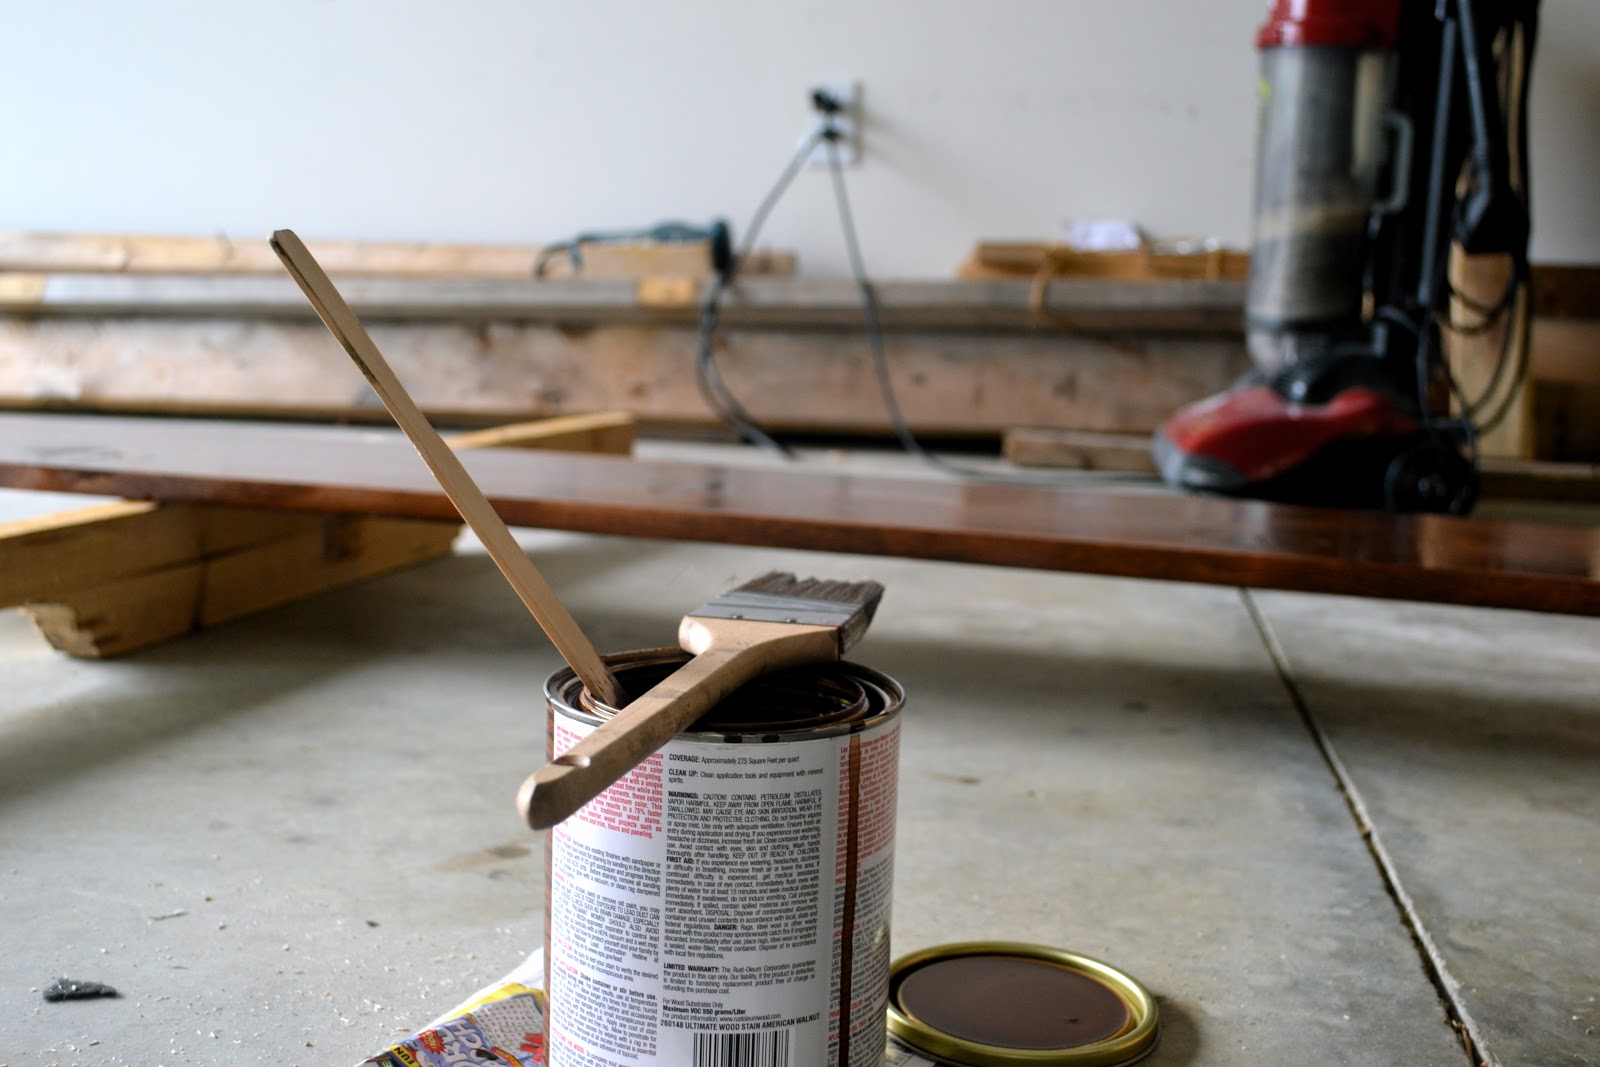
I started by sanding my 1 x 10. I started with 100 grit sandpaper and worked my way to the finer 220 grit. I sanded the entire board because I'm slightly OCD, but if you know what side you want to use, then you only need to sand that side. I would recommend sanding all the 1 inch edges as well since sometimes those can have sharp edges or splinters. I was so excited to get going on this that I forgot the camera. Sorry : (

Next I whipped out the Rust-oleum stain and started slapping it on. Please ignore the crazy red head in the photo. I have no idea why she started working in the garage in her pajamas. Crazy woman.


I waited for about 5 minutes before I started to wipe off the excess stain with an old t-shirt (Thanks, Dad).


I went inside to check on Jackson and to grab a snack while I waited for the stain to dry. It only took fifteen minutes or so. Next, I set up the measuring tape next to the 1 x 10 and marked out the tick marks with a pencil. In order to hang it, I needed to start the tick marks at 6 inches (so I could hang it 6 inches from the ground).


After all the tick marks were in place I printed out numbers in my favorite font (size 200 pt.), cut them out and laid them out on the board. Once I had them lined up where I wanted them, I traced over top of the number, making indentions in the wood. 


With black acrylic paint, I hand-painted the tick marks and numbers (painting within the indentions I had made in the wood).

Ta-da!


What do you think?


 Sorry for the lame pictures, it's late :) But I wanted to be able to finally have something to show for all of this time I've been "supposedly" working on projects. I'm pretty stoked about it. Check back to see how I plan to mark his height each year :)

Thanks for stopping by!

Thursday, October 11, 2012

Pinterest projects, anyone?

Okay, so I have about 47 projects on my to-do list, all pinterest inspired, of course. While I am continually adding new ideas to my ever-constant to-do list, I am significantly lacking in the project completion area. My loving husband carefully pointed this out to me last night as I showed him yet another craft on my list.

 "Are you still going to make a bookshelf out of all that pallet wood I helped you disassemble?" (Don't remember my crazy happy pallet day? Check out this post.)

Whoopsies.

So, in honor of my wonderful husband who supports me in my fanatic love of making to-do lists and my not so fanatic love of finishing the task...here are a few creations that I've come up with in the past few weeks. I promise I've been doing something with my time other than running (yes, running) after my adorably active son.

1. Letters for Jack's nursery


These letters are finished, but the silly command strips didn't work very well. Apparently his name is, "JAC." Chuck thinks he got a little impatient pushing the letters against the wall for them to stick. His name is too long...


2. Jackson's wall decal

Sorry, no photo yet. I never remember to go in there until it's naptime or bedtime!

3. Lamps for the master bedroom


4. Canvas paintings for Jack's nursery


I've done a little bit more on these but haven't been able to take photos yet.


The only problem with each of these projects is that they are all at the "dang, I forgot to get frames-is it supposed to do that?-stupid command strips didn't work-forgot to take pictures-can't find lamp shades to work" stage. Alas, I'm still unable to cross them off the official to-do list. In case you were curious, which I'm sure you were, I will be posting about the completed projects with tutorials :)

So, cheers to all of you half-project doers! May nap time never be long enough!

Sunday, September 9, 2012

Sleeping baby.

On Tuesday of this past week I was struggling to get Jack to take his second nap. In fact I had been trying for almost an hour. Finally the whines coming for his bedroom stopped. Sweet relief. I opened up the 4th Harry Potter book to relax. 

And then the doorbell rang...

Seriously? 

A man running for state representative was advertising himself and consequently waking up my son who had JUST fallen asleep. I wanted to cry...and not vote for him in November. Since I didn't want to curse all unknowing citizens that happened to ring the doorbell at the most inopportune time...

I decided to make a sign for our door. So I downloaded a cute font from dafont.com (an awesome site with tons of fonts that you can download for personal use - they also have some for sale as well) and came up with this sign:


Ironically enough, the UPS man rang the doorbell while I was making it. I actually said aloud to myself, "You've got to be kidding me." Fortunately, the little guy was so wiped out he slept right through it. Disaster averted.


Forgive the phone pictures, I'm currently camera-less. 

But, I'm happy to say that the next person to come to the door did, in fact, knock instead of ring the doorbell. Mission accomplished. 

Wednesday, August 15, 2012

Gallery photo wall.


We have officially completed our first decor project for our new home! We are pretty proud of ourselves :) In fact, I was so excited to post about it that I haven't even put all the pictures in the frames yet. Whoops.

I've been dreaming up this project since before we even moved in. I LOVE photos and feel like they should be displayed. I have seen different gallery walls all over pinterest but wasn't sold on any particular "template." So, with a little pinterest inspiration, we went to work on designing our own gallery wall.

Read on to find out how to build your own gallery wall! If you're just in it for the photos, please look at your leisure and skip all the nonsense :)

Cost:

Depending on how many tools and frames you already own, this project could cost anywhere from $10-$70. I ended up spending around $60 (for 9 frames, nails and hanger clips and the letter).

Tools:

  1. Hammer
  2. Pencil
  3. Level
  4. Nails and hanger clips
  5. Paper
  6. Frames (and photos to go in them, of course!)

Time commitment:

This took us a total of 4-5 hours over the span of a few days.

First, decide on what "theme" you want. Gallery walls are a great way to make a house a home and it can say a lot about you. Take the time to consider photos, color, art and other wall decor that you want to include.
I started with a trip to Hobby Lobby who had their frames for 50% off that week. We already had a few black frames and I felt like black always looks classy, so we went with all black frames, some with mats, some without. I also picked up that fun letter at Hobby Lobby for $3.

 Next, I arranged all the frames on the ground the way that I wanted them to be on the wall.


After I got everything exactly where I wanted it, I measured the distances between each piece and sketched it out. I'm a perfectionist and needed to be sure that everything was going to hang the way I had planned.

This is when I recruited my husband to help me with the actual hanging. We started in the center and worked our way out. The first thing that went up was the K and then the frames around it.


Our "frame hanging" check list:

  1. Place the frame on the wall and measure distances to the closest frames to make sure it is where you want it in relation to the other frames.
  2. Check to make sure it is level.
  3. Lightly trace the corners of the frame with a pencil.
  4. Check to make sure the markings are level.
  5. Measure how far down and inside the hanger is from the corners of the frame. (I found a hint on pinterest that says to put a dab of toothpaste on the hanger and then place the frame where it should go in order to get the nail in the right spot! Too bad I read that two days after we had hung all the frames.)
  6. Measure this same distance on the wall where the corners have been penciled in. Mark that spot with a pencil.
  7. Nail the hanger into the wall.
  8. Hang the frame.
  9. Check to make sure it is level.
  10. Erase any pencil marks that are visible.

After the second night of working on the gallery wall, this is what we had up.


A few tips:
  1. The level part is EXTREMELY important. Don't skip those steps or you will end up having to start over. Trust me on this :)
  2. Make sure you stand back and check the look of your wall after each frame is hung. This way you can avoid having to move multiple frames if you decide you don't like the look.
  3. Laying out the frames AND taking a photo of the configuration while it was on the floor helped us tons! Not having to think about where to hang the next frame was a huge plus, especially for the extremely indecisive :)
  4. Don't hang frames while a baby is sleeping in the next room...whoops.


We LOVE our new photo wall. It is hung on the hallway from the entry way to the great room, which is a perfect way to welcome guests and make them feel at home. Let us know what you think of our first of many home decorating projects!

Next on the list is a lovely little crate bookshelf to go under the gallery wall : ) 

Monday, August 13, 2012

Pallets, pallets, pallets!

As Chuck and I have started to decorate our new place, we have discovered that our 500 dollar decoration budget isn't going to go very far when you need (okay, okay...want) to furnish, paint and decorate. We have only spent about 200 dollars of that budget so far on our photo wall (coming soon!), Jackson's nursery decor and paint, an antique trunk for the entry way and other miscellaneous Michael's and Hobby Lobby purchases. However, my mind is bursting with decorating ideas that our budget just doesn't have room for.

Solution? FREE THINGS. Kind of a no brainer, right? Thanks to my mom, dad and Leah our whole place is pretty much already furnished (super duper blessed). However, we are seriously lacking in the book case/storage area and wall art. 

Solution? FREE THINGS. Duh. So, I've been checking the craiglist "free" section almost daily for wood. Any type of wood. I have been seeing tons of awesome pallet and reclaimed wood projects all over pinterest and wanted to try my hand at some of them. 

So during Jackson's morning nap, I went to peruse craigslist. BAM. There was a post not an hour earlier listing TONS of pallets sitting in a parking lot a whole THREE miles from our house. Joy. So, I gathered all of my things, called my dad to borrow his truck and waited rather impatiently for Jackson to wake up. Eventually we made it and they were still there!


I am now 9 pallets richer. I would have grabbed more if they would have fit. Thank you, craigslist for making my life happier, yet again.

Here are some of my ideas:

An awesome farm table of some kind. I have a few different ideas floating around in my head for this one.
source
Bookshelves for Jack's room.
source
Bookshelves for the office area or living room.

source
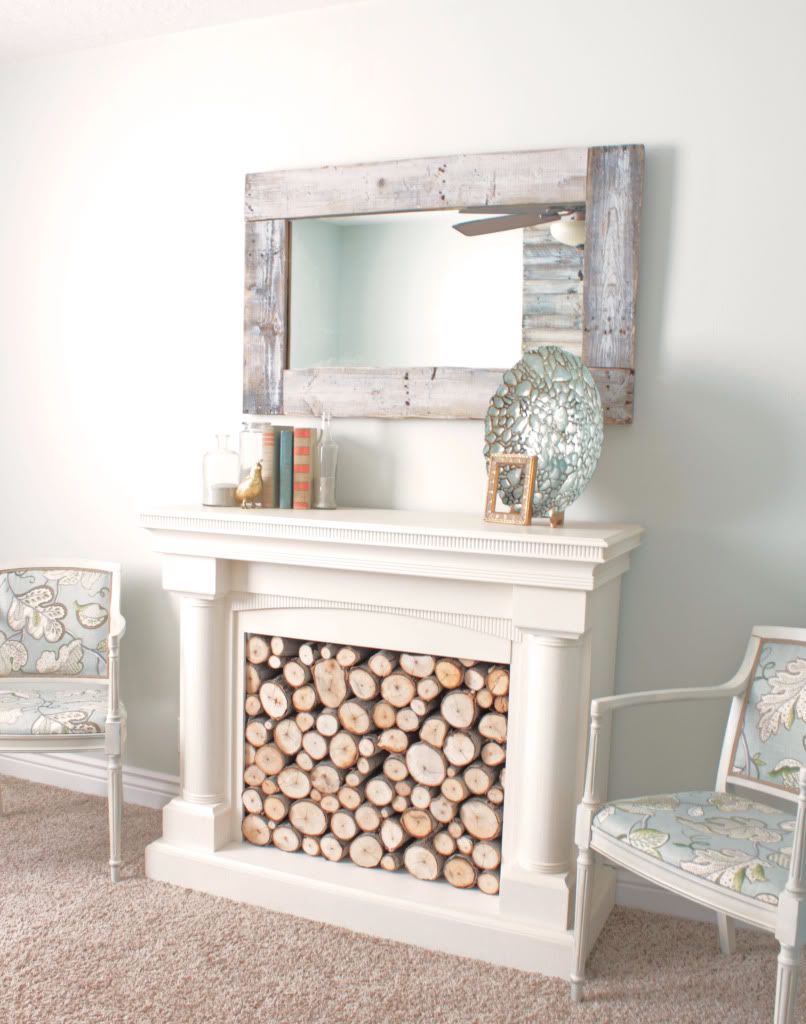
An awesome reclaimed wood mirror.

source
Storage crates! To replace our ugly tupperware box that is currently holding our blankets.

source
More storage/bookshelf ideas.

source
Which one is your favorite? Or do you guys have any better ideas? Please share!