Showing posts with label wood. Show all posts

Wednesday, October 31, 2012

Jack's Bookshelves.

Jackson's nursery is coming together. Don't worry, he'll only be a year old in less than a month.


I knew that I wanted to have bookshelves in Jackson's room. I wanted him to love books as much as his parents do and to be able to pick out the ones that he wanted to read. I found this awesome plan for bookshelves on Ana White's website (only the coolest DIY furniture site known to man). I purchased 2 1x4's in order to make two 2 1/2 foot shelves. We had some 1 x 2 furring strips for another project lying around and used those for the lip on the front. It was a simple project, especially for our fist wood-working project!

I followed Ana's instructions completely, so I'd check out her plan. But, I'll go ahead and give you a play-by-play here.

Time Commitment: 1 hour

Cost: around $10 (enough material for three 2 1/2 foot shelves)

Tools: (I got all of mine at Lowe's)

2 1x4's at 8 feet long
1 1x2 furring strip
2 in finishing nails
2 in wood screws
Stain or paint
Drill
Square
Pencil
Sander
Circular saw
Old cloth

1. Measure out how long you want your shelves to be on the 1x4s. I chose 2 1/2 foot shelves, so I marked it with a square and cut. I'd recommend marking and cutting separately for each piece. As you won't cut exactly on the line every time, this will make sure all the pieces are as close to 2 1/2 feet as possible.

Note: Wear safety googles! (Or sunglasses if you don't have safety goggles...) Unless, you want wood shavings in your eyes, of course. (Really not fun)

 2. Sand down your pieces with a finishing sander with 150 grit sandpaper. You could use coarser or finer if you'd like, but I stuck right in the middle, since I'll be sanding again when they are finished.


 3. Use wood screws and a square to attach the 1x4s. You should probably use some wood glue, but I forgot. Whoops!


 4. Use finishing nails, wood glue and a hammer to attach the 1x2 to the front of the shelf.


 5. Sand again with 220 grit sandpaper.


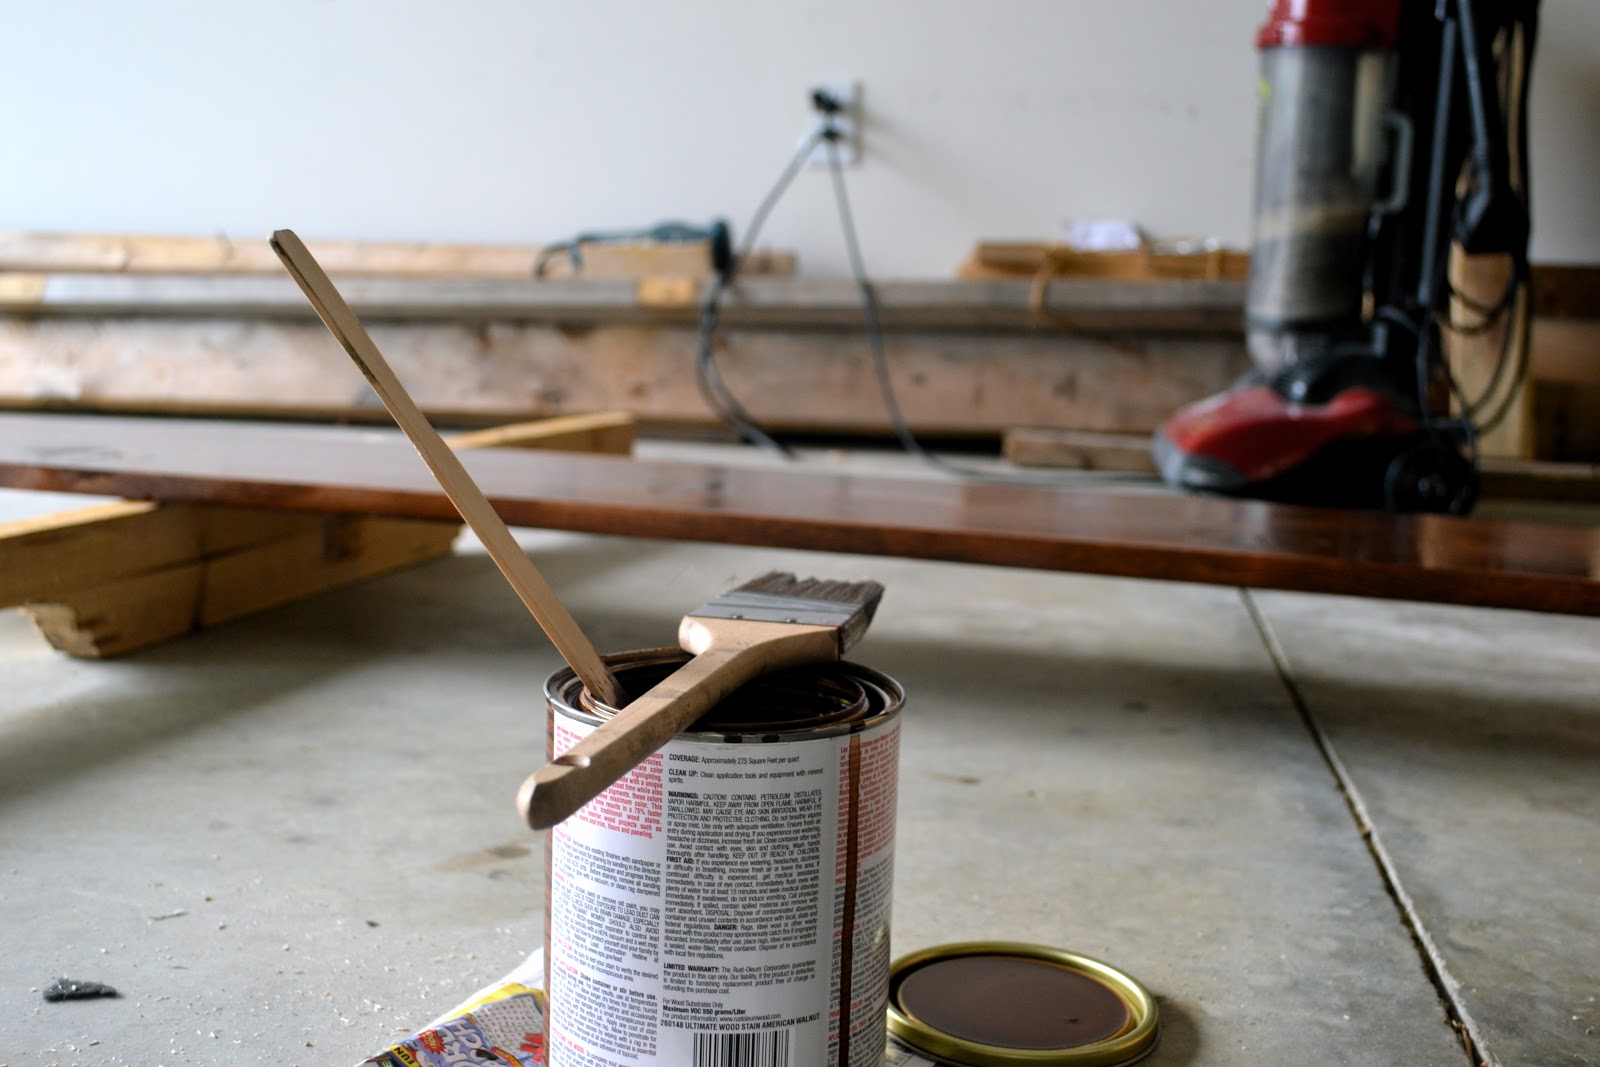
 Woo Hoo! You just built a shelf! I stained mine, so I just slapped some good ole' Rustoleum American Walnut stain on there, let it sit for 20 minutes and wiped it down with an old cloth. I repeated that a second time to make the stain a little bit darker, but it didn't quite work as expected.


Then we just screwed them into the wall! (Do not try to use anything but screws directly into the wall. It will not work. Not like we tried...duh.)


The little man loves them :) And so do I. So everyone's happy :)

And Happy Halloween!

Wednesday, October 17, 2012

Ruler Growth Chart for little ones.

I've finally started finishing some of the twenty something projects I have going right now! Woot woot. I bought the supplies for a wooden height chart that I saw on pinterest ages ago, but just hadn't started it because there were more pressing projects at hand. But last weekend I started it and finished it all in one day! That rarely happens. Okay, never happens. The work was quick and I had Chuck to help out with Jackson so I just kept on trucking!

source

I saw this adorable oversized ruler growth chart floating around pinterest and wanted to try making it on my own.

Time commitment:

around 4-5 hours

Cost: 

approximately $15

Supplies:

1. Rust-oleum's american walnut stain (I got mine at Lowe's for seven dollars and some change)
2. A 1 x 10 x 6 (I also got this at Lowe's for around five dollars)
3. Black acrylic paint (I used some old stuff I had on hand)
4. Printed numbers 1-6 (I printed my favorite font at 200 pt.)
5. Pencil
6. Measuring tape
7. Paint brush
8. Finishing sander with 100, 150 and 220 grit sandpaper
9. Old rag

I started by sanding my 1 x 10. I started with 100 grit sandpaper and worked my way to the finer 220 grit. I sanded the entire board because I'm slightly OCD, but if you know what side you want to use, then you only need to sand that side. I would recommend sanding all the 1 inch edges as well since sometimes those can have sharp edges or splinters. I was so excited to get going on this that I forgot the camera. Sorry : (

Next I whipped out the Rust-oleum stain and started slapping it on. Please ignore the crazy red head in the photo. I have no idea why she started working in the garage in her pajamas. Crazy woman.


I waited for about 5 minutes before I started to wipe off the excess stain with an old t-shirt (Thanks, Dad).


I went inside to check on Jackson and to grab a snack while I waited for the stain to dry. It only took fifteen minutes or so. Next, I set up the measuring tape next to the 1 x 10 and marked out the tick marks with a pencil. In order to hang it, I needed to start the tick marks at 6 inches (so I could hang it 6 inches from the ground).


After all the tick marks were in place I printed out numbers in my favorite font (size 200 pt.), cut them out and laid them out on the board. Once I had them lined up where I wanted them, I traced over top of the number, making indentions in the wood. 


With black acrylic paint, I hand-painted the tick marks and numbers (painting within the indentions I had made in the wood).

Ta-da!


What do you think?


 Sorry for the lame pictures, it's late :) But I wanted to be able to finally have something to show for all of this time I've been "supposedly" working on projects. I'm pretty stoked about it. Check back to see how I plan to mark his height each year :)

Thanks for stopping by!

Monday, August 13, 2012

Pallets, pallets, pallets!

As Chuck and I have started to decorate our new place, we have discovered that our 500 dollar decoration budget isn't going to go very far when you need (okay, okay...want) to furnish, paint and decorate. We have only spent about 200 dollars of that budget so far on our photo wall (coming soon!), Jackson's nursery decor and paint, an antique trunk for the entry way and other miscellaneous Michael's and Hobby Lobby purchases. However, my mind is bursting with decorating ideas that our budget just doesn't have room for.

Solution? FREE THINGS. Kind of a no brainer, right? Thanks to my mom, dad and Leah our whole place is pretty much already furnished (super duper blessed). However, we are seriously lacking in the book case/storage area and wall art. 

Solution? FREE THINGS. Duh. So, I've been checking the craiglist "free" section almost daily for wood. Any type of wood. I have been seeing tons of awesome pallet and reclaimed wood projects all over pinterest and wanted to try my hand at some of them. 

So during Jackson's morning nap, I went to peruse craigslist. BAM. There was a post not an hour earlier listing TONS of pallets sitting in a parking lot a whole THREE miles from our house. Joy. So, I gathered all of my things, called my dad to borrow his truck and waited rather impatiently for Jackson to wake up. Eventually we made it and they were still there!


I am now 9 pallets richer. I would have grabbed more if they would have fit. Thank you, craigslist for making my life happier, yet again.

Here are some of my ideas:

An awesome farm table of some kind. I have a few different ideas floating around in my head for this one.
source
Bookshelves for Jack's room.
source
Bookshelves for the office area or living room.

source
An awesome reclaimed wood mirror.

source
Storage crates! To replace our ugly tupperware box that is currently holding our blankets.

source
More storage/bookshelf ideas.

source
Which one is your favorite? Or do you guys have any better ideas? Please share!